
Getting the Best Performance from Your Equipment
Installation and user tips. Guidance for programs.

Installation Tips
Keep the central shaft pin tight. On the Versa, you’ll need to insert and tighten the two-inch stainless-steel pin that connects the central shafts. If it loosens, open the angled component to access the set screw hole and use a 1/8" Allen Wrench to tighten it (turn to the right). Check it before each trip.
Get the right positioning with your mount. If the mount is too far away, you may overextend, causing strain or even breaking the clevis post. Adjust so the paddle feels comfortable and natural. Sit in the kayak before drilling to find the best mount positioning.
Install the mount it securely. The hinged mount must be physically secured with nuts and screws to the coaming. All three contact points — including the side brackets and hinged plate — should be firmly attached. Installation is tricky, we have custom solutions and workarounds that can help.
Glue your ball joints. On the hinged mount, make sure both ball joints are secured with glue or epoxy and that they fit snugly in the half-cup side brackets.
Attach the clevis fork. The Versa or Gamut can be difficult to remove from the clevis fork, by design. We recommend you put the clevis fork on to the paddle first, then place it on the support post. To get it loose, you may have to give it a strong tug. It’s easiest to do this with the clevis fork and paddle off of the support post. Be careful not to accidentally send the clevis fork flying into the water when you remove it. Consider adding a tether to avoid losing the clevis fork.
Use the SnapNStraps. If you have a Gamut Paddle Holder, purchase a set of the SnapNStraps for the RotoGrips to keep the paddle extra secure.
Keep your sticky cups clean and dry. The “sticky cups” that may come with the Apex Mount will last longer if you take care of them properly. Keep the backing that originally comes with them for storage when they’re not in use. Avoid adhering and removing the cups frequently as this will shorten their life. Keep them clean and dry when not in use.
Add flotation (or be aware the parts don’t float). Unfortunately, most of our components don’t float. We do have floatation material inside the Versa Paddle shafts but they still may not float due to their weight. One option is to add more spray foam inside each shaft (stop before the first shaft hole) or attach pool noodles. For the clevis fork, use the tether ring on the clevis fork (if applicable) to keep it attached to the mount. Always have a backup paddle and tow rope on board in case of emergencies.
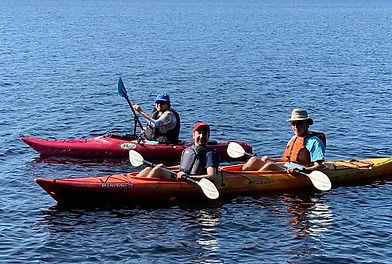
User Performance Tips & Paddling Tips
Use downward pressure on the paddle. With a “regular” paddle, users tend to lift the paddle with each stroke. However, doing so with the Versa or Gamut systems may result in the clevis fork from popping off the support post. Instead, our systems work best when the paddler uses a gentle downward pressure on each shaft. It’s almost more of a push-pull motion. If you run a program make sure your team and users understand this tip!
Elongate your stroke. For maximum power with each stroke, push the blade forward as far as comfortable and pull it back through the water. Avoid a short “up and down” motion, which is less efficient.
Don’t lean on the mount. Use the hinge to move it up for entry or exit — never put your body weight on it Avoid letting it hang open when not in use, which puts stress on the hinge plate and coaming.
Practice switching from angled to straight. Practice using the thumb pin to change the angle of Versa. Do this on dry land. Lift the left shaft up a bit to take the pressure off the thumb pin in its slot so that it can be adjusted. Pull back toward the right on the button to retract it. Also practice using the three push pins on each shaft to adjust the length of the paddle.
Experiment with the shaft length. The Versa Paddle can be adjusted to three different lengths. Depending on how wide your kayak is and how far it is positioned from the water, you may want to adjust the length.
Adjust Versa angle for conditions. Many paddlers find it easiest to use the paddle straight and off the mount when entering or exiting the water.
-
Straight mode, on the mount: Great for open water and choppier conditions.
-
Angled mode, on the mount: Works well in calm water to reduce paddle skipping.

Program, Family & Client Tips
Train your volunteers, staff or family. If you have staff, volunteers or family members assisting paddlers, make sure they know how to set up, adjust, and remove the systems. One small thing you can do is send them a link to this very blog! We do offer training and onsite consultations for organizations.
Use it only when needed and store it carefully. Our systems are highly engineered products with multiple moving parts. The components can get lost or damaged if handled roughly. Only bring it out for paddlers who need it. Clean your system after each use. Remove it and store it in a designated bag or container.
More Resources
For more tips, videos and instructions, subscribe to our YouTube channel.
You can also learn more tips – including assembly and installation – by watching these more detailed videos.
